Tuesday~ Tortilla Soup, Corn Bread with Honey Butter

Wednesday~ Chicken Parmesan, Salad
Thursday~ Beef Stew, Fresh Bread
Friday~ Pizza, Salad
Saturday~ Fajitas, Chips & Salsa
Sunday~ Roast, Mashed Potatoes, Green Beans


Tuesday~ Tortilla Soup, Corn Bread with Honey Butter
Wednesday~ Chicken Parmesan, Salad
Thursday~ Beef Stew, Fresh Bread
Friday~ Pizza, Salad
Saturday~ Fajitas, Chips & Salsa
Sunday~ Roast, Mashed Potatoes, Green Beans
Thank you so much to Alisa and Briana for featuring my recipe here on Sweet Peas and Bumblebees!
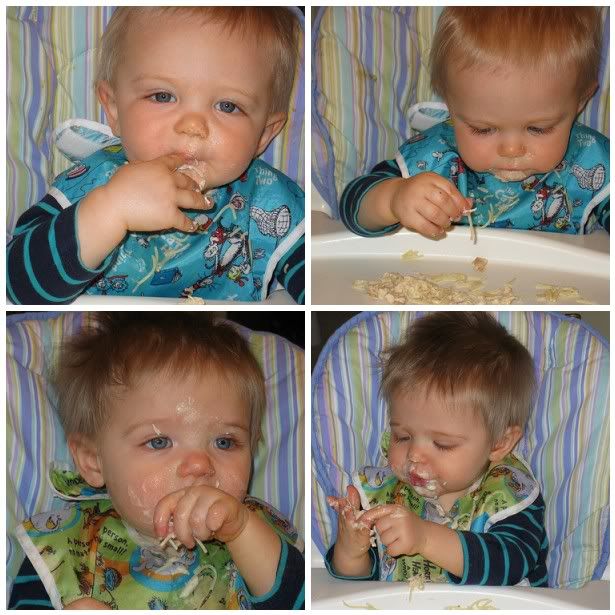
A little about me, I am a stay-at-home mom to 2.5 year old twin boys and a one month old baby girl. I love to craft whenever I have spare time, which recently I haven't had much of! I love to make cards, stamp, scrapbook, sew and quilt. Stop on over to my blog, Live. Love. Create., if you get a chance!
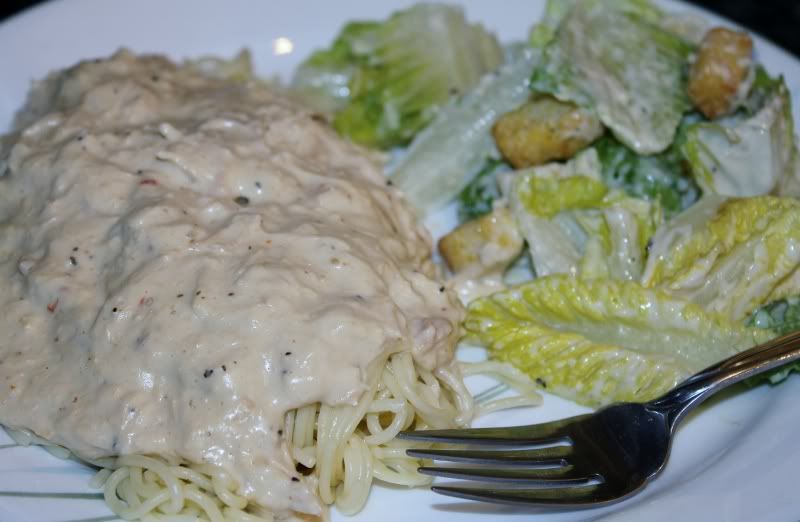
This recipe has been a family staple for a few years now and I love to make it for friends and family, because it is simple to make and always gets a compliment. Here is what you need to make Cheesy Crock-pot Chicken (my husband came up with the name, I know it's not original, I am completely open to suggestions!)
Ingredients: (Serves 4)
In a small crock-pot (I use a 3.5 quart) add your chicken breasts to the bottom. In a separate bowl, combine your Italian seasoning, water, and wine and pour over your chicken breasts. Cover, and cook on high for 3-4 hours, or low for 6-8 hours. About a half hour before you want to serve this, remove the chicken and cut into bite sized pieces. Add the cream cheese and cream of chicken soup to the remaining sauce in the crock-pot and mix well. Replace the chicken in the crock-pot, cover, and cook on high for approximately 30 minutes. Serve it over your favorite style of pasta with a side salad and/or veggies. Enjoy!
If you have a larger crowd to feed, double the recipe but be sure to use a larger crock-pot. Thank you again to Sweet Peas and Bumblebees for featuring my recipe!
~~~~~~~~~~~~~~~~~~~~~~~~~~
Thank you Kelly for the amazing recipe! I can’t wait to try it! Also, thanks again for sharing your crock pot favorite…LOVE crock pot recipes! =) Also, your little guys are A-DOR-ABLE!
It’s time to announce the winner of the Shabby Apple giveaway! This winner will win this amazing vintage keepsake key!

Thank you so much Shabby Apple for this wonderful giveaway for our Sweet Peas and Bumblebees followers!
Now on to what you’ve been waiting for…
The winner of the Shabby Apple giveaway is…
Congratulations! I’m emailing you now!
This sweet Halloween treat is quick to make and absolutely delicious! It is sure to please your Halloween crowd!
Start by mixing together your yellow cake mix, egg, and margarine until thoroughly mixed.
Press the cake mixture into the bottom of a 9x13 pan and bake at 350 degrees for 12 – 14 minutes.
Remove the cake from the oven and add 3 cups mini marshmallows to the top. Bake for 3 minutes.
In a saucepan heat Karo syrup, peanut butter, sugar, brown sugar, and vanilla. Stir constantly until the mixture is bubbly and smooth.
Add Rice Krispies, candy corn, and peanuts until combined.
Spread the candy corn mixture on top of the marshmallows and enjoy!
~~~~~~~~~~~~~~~
Candy Corn Bars
Preheat oven to 350 degrees.
Mix cake mix, egg, and margarine until combined. Press the cake mixture into a 9x13 pan and bake for 12 – 14 minutes.
Remove the cake from the oven and top with 3 cups mini marshmallows. Bake for 2 minutes.
In a saucepan, heat Karo syrup, peanut butter, sugar, brown sugar, and vanilla. Stir until bubbly and smooth. Add Rice Krispies, candy corn, and peanuts to the sugar mixture. Stir until combined. Spread on top of marshmallow layer.
I was looking for a cute idea to make my little guy for Halloween! Why are all the super cute ideas for little girls??? I have made these before, and decided to pick up some cute Halloween fabric and make a tie onesie for him. I am so happy with how it turned out!
Want to make one of your very own?
Halloween Tie Onesie
Iron on your Heat n’ Bond to the back of your fabric.
Print your pattern from here.
Trace your pattern on the back of your Heat n’ Bond.
Cut out the pattern.
Peel off the paper backing from your Heat n’ Bond.
Center the tie onto your shirt, making sure the knot overlaps the top of the tie.
Iron the tie onto your shirt.
Stitch around the tie with an applique stitch or a zig zag stitch (I used a zig zag stitch)
That’s it….wasn’t that so simple?
Don’t let this picture fool you, my little guy really liked his tie onesie….what he didn’t like was his mommy making him hold still for the picture! (:
I just finished this last night & am so excited to show it off this morning! Applique has been one of my loves lately…..and it is so much fun experimenting with it! I found the idea and pattern here. Then I decided to add the bow to the pumpkin to make it even more special for my little girl!
Isn’t that adorable?
Want to make your own?
{Too Pretty To Be Scary} Pumpkin Shirt
Start out by creating the ruffle in your fabric. Take your orange fabric and sew two lines down the fabric. Use a straight stitch & make sure it is the longest stitch your machine will do.
Gather your material by firmly pulling on the top thread. You will need to move the gathers you have created to create a uniform look.
Take your fabric and iron it flat. This seems like it will mess it up…but it won’t!
Place your Heat n’ Bond on the back of your fabric and iron on, according to the directions. Once cool, remove the stitching from the top of the fabric.
Print your template from here. Trace your pumpkin from the template you printed onto the back of the Heat n’ Bond (it is a paper backing, so it makes tracing the pattern very easy). Cut out the pumpkin. Peel the backing off of the Heat n’ Bond.
Iron your Heat n’ Bond onto your green fabric. Trace the stem from the template on your green fabric. Peel the backing off of the Heat n’ Bond.
Place your stem and your pumpkin onto your shirt, making sure they are centered (I placed the bottom edge of my stem slightly under the pumpkin). Iron on according to the directions on your Heat n’ bond.
Sew around your pumpkin and stem using an applique stitch or zig zag stitch.
Now for the bow…
Cut your ribbon & lay them out how you want them (notice how the 6 inch piece of ribbon is vertical to all the others….this is the ribbon you are going to use to tie them all together).
Using your fingers, scrunch the 5 pieces of ribbon together at the center and then tie your 6 inch piece of ribbon around them, knotting twice (you may need a spare hand for this).
Now all you have to do it sew your bow on. Use a needle and thread, making sure you thread is doubled. Start from the back of the shirt and hand sew your bow on, making sure to stay under the tied ribbon (the black ribbon) & close to the center knot, so you will not be able to see your thread.
That’s it….now show off you beautiful applique pumpkin shirt!
Did you notice the matching Korker Bow I made? Stay tuned for the tutorial….
Thank you to everyone who took the time to link up last week! Your projects and recipe are amazing and we’re always inspired by you all!


I have a SUPER easy fall idea for you today…it seriously took me about 10 minutes to make. I {HEART} quick crafts!
I bought this cute little fake pumpkin at our home improvement store today for $2.99. It was on clearance since Halloween is just around the corner.
Using a Cricut or Sillouette, cut our your vinyl and weed it. {This was definitely the most complicated step in the process since the pieces in the scroll design were so little….we crafters are so persistent! :) }
Using transfer tape, apply the design to the center of your pumpkin.
And you’re done! I told you it was an easy one! ;) I think I’ll spray a thin coat of sealant over it before I store it for next year to ensure that none of the vinyl comes off. I LOVE the way it dresses up the top of our entertainment center!
Tuesday~ Eat Out
Wednesday~ Lemon-Zucchini Fettuccine, Salad
Thursday~ Spicy Shrimp Tacos with Blueberry Corn Cilantro Salsa
Friday~ Chicken Parmesan, Green Beans
Saturday~ 7 Layer Bean Dip
Sunday~ Slow Cooker French Dip Sandwiches, Onion Rings


