As I’ve mentioned many times before, I LOVE Pinterest! This idea came from one of my daily Pinterest searches…I’m seriously addicted ya’ll! :) I thought it was super cute and knew I could recreate my own. And what was even better is that I had all of the supplies already, so this project cost me zero dollars!!! LOVE, LOVE, LOVE when that happens!
Ready to make your own?
Start with a fence panel (or something similar). Cut your panel into approximately 24” long pieces. (Since the panel was super long, I was able to make 3 of these cute signs….I’m thinking Christmas presents! :) )

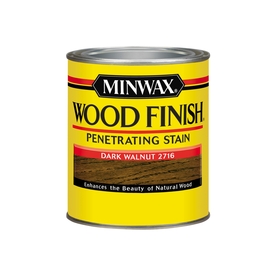
Using a dark walnut stain, paint a thin layer of stain onto all surfaces of your wood panel. Let it dry.
Using my Sure Cuts A Lot 2 Software and my Cricut, I cut out a stencil using vinyl to use on top of my fence piece.
NOTE: You can definitely do this step with stencils or free hand if you don’t have Sure Cuts A Lot 2 or a Cricut.
Using transfer tape, attach your vinyl to your wood piece. Remove the vinyl and rub the vinyl so there are not any gaps or air bubbles.
Using white acrylic paint, paint the letters onto your wood. (Remember to use a tapping method when you paint so that you don’t get any paint underneath your stencil.) Let it dry. When your paint is completely dry remove your vinyl.
Lightly sand over top of the letters to create a distressed look.
I LOVE how it turned out!


2 SWEET COMMENTS::
I love, love, love it!!! I have a cricut and never thought about making your own stencils!! I definitely think I will be doing something like this is the future! Thank you for the cute idea!
Jill
twoyellowbirdsdecor.blogspot.com
Love this! Great job! Thanks so much for linking up to Tuesday Talent Show! I would love to have you stop by and link up again tomorrow with more great projects!
-Nikki
http://chef-n-training.blogspot.com/
Post a Comment