LinkyParties FeaturedOn AdvertiseOn AboutUs ContactUs
Don't forget to link up to our weekly {{What I Made Wednesday Party}}!

Wednesday, May 18, 2011

What I Made Wednesday #9

It is here again…the day we LOVE the most of all….the day we get to see all the AMAZING {{{and I truly mean that word}} things you have created!!! Thanks for making our linky party a success each week!  We are slowly getting more and more additions to our party….WE LOVE IT!!

We would like to highlight a couple of creations that caught our eyes last week!  Hard to pick….but I guess we had to! :)

All I can say is Y-U-M-M-Y!!!!!  Rindy Mae made this mouth watering creating that I have been dreaming about ever since I saw them!  I have even been telling everyone I know about them…and I haven’t even made them yet!

The cookies look scrumptious…and the picture is so CUTE!!! The Homemade Parade made the yummy cookies that I can’t wait to try!  Cookies….good, Rolos….delicious, combine the two….genius!

Lately, I am in to everything personalized!  So, of course, I LOVED these mugs that Running With Glitter made!!  They would be such cute gifts!  And I will have to make one for myself first….of course!!!

Now on to the

What I Made Wednesday Party…..

{{The Details}}:

  • Must be made by you.
  • Link up to your specific post - not your main blog.          (Please no Etsy shops or giveaways)
  • Please post our button or link back to our blog so more people can join in the fun.
  • Visit some of the other participants and leave them a comment to show your LOVE!
  • We hope you LOVE our blog...if you do, we would LOVE it if you become a follower!

{{What I Made Wednesday}} will be open Wednesday – Friday. Next Wednesday we will feature some of our favorites from this week's party as well as host a new {{What I Made Wednesday}}!


Tuesday, May 17, 2011

Gushers Rings

I recently stumbled upon this idea here, and knew that my daughter would LOVE this!  What little girl doesn’t love rings???  Especially rings you can eat!!!!

new 023

What you need:

  • Yogurt covered pretzels {I could only find the round ones in the 100 calorie packs}}
  • Gushers
  • White chocolate or vanilla almond bark

new 015

  1. Lay out a sheet of wax paper on your working surface.
  2. Melt your chocolate in a microwavable bowl in 30 second increments, stirring after each 30 seconds until chocolate is smooth.
  3. Dip one side of the pretzel into the melted chocolate and attach the Gushers.
  4. Let them cool on the wax paper.new 017
  5. Let your little one wear and gobble them up!


Alisa_Signature

Monday, May 16, 2011

{{Slight Change}} & Café Rio Chicken Burritos

If you could see my kitchen right now, you would understand why my usual Menu Monday post is not up today.  I don’t know what I will be cooking this week, I have no stove, no sink, no countertops, no dishwasher…..I might just be eating out!!! 

My hubby is hard at work on our kitchen….it just seems to be taking a lot longer than I thought {{{this could be because I am trying to make due without the kitchen necessities I am used to!}}}  Maybe I should start reading up on home improvement and then I could help him??? (;

kitchen 008

I am pretty sure my Menu Monday post would be useless this week!! (:

So, to make up for it, I am posting an AWESOME recipe that I got from a friend!  If you live in Utah and haven’t been to Café Rio…YOU HAVE TO GO!!!  It is the best food you will every try!  My friend actually asked the store manager if they would give her the recipes……and they did!!!!  So I hope you enjoy!!!

Café Rio Chicken Burrito

bike 007

Cilantro-Lime Rice

  • 1 c. uncooked white rice
  • 1 tsp butter
  • 2 cloves garlic, minced
  • 1 tsp freshly squeezed lime juice
  • 1 can (15oz) chicken broth)
  • 1 c water
  • 1 Tbs freshly squeezed lime juice
  • 2 tsp sugar
  • 3 Tbs fresh chopped cilantro

In a microwaveable bowl, combine rice, butter, garlic, 1 tsp lime, chicken broth & water.  Microwave 15-20 minutes or until rice is tender.  In a small bowl, combine lime juice, sugar and cilantro.  Pour over hot cooked rice and mix in as you fluff the rice.

Chicken

  • 6 chicken breasts
  • 1 (8 or 9 oz) bottle zesty Italian dressing
  • 1 Tbs chili powder
  • 1 Tbs cumin
  • 3 cloves garlic

Cook in crockpot on high for 5-7 hours.

Tomatillo Dressing

  • 1 package ranch dressing
  • 1 cup buttermilk
  • 1 c mayo
  • 2 tomatillos
  • 1/2 Tbs lime juice
  • 1 small jalapeno
  • 1 clove garlic
  • 1/3 bunch cilantro

Add all of ingredients to blender.  Blend.  Refrigerate until ready to serve.

Fresh Salsa

  • 3 large tomatoes, diced
  • 1 white onion, minced
  • 1/4 bunch cilantro, chopped
  • 2 cloves garlic, minced
  • 1/2 tsp lime juice
  • 1 tsp salt
  • 1 tsp pepper

Combine all of ingredients and let sit at least 30 minutes to soak up flavor.

Serve on warm tortillas with black beans, cheese and green leaf lettuce.


Happy Monday!!!

Alisa_Signature

Saturday, May 14, 2011

Frosted Banana Bars

My friend found this recipe at Sisters’ Stuff and shared some of the bars with me!  They were absolutely delicious and I will definitely be making these for my family this weekend!  They were amazing!

image

Go here for the recipe!

Thursday, May 12, 2011

Green Bean, Tomato & Feta Pasta

My lovely sister recently posted a version of this recipe….Chicken with Green Beans, Tomatoes & Feta!  I decided to make the original recipe last night, which is made with penne pasta instead of chicken!  This dish is SO SCRUMPTIOUS that I felt it was worthy of another post!  This dish reminds me of summer & around here we will take all that we can get {{it has been snowing the last 2 days…..((insert me crying!!))}}  I hope your families enjoy it as much as ours……it is one of those recipes that you will want to make over and over again!  Plus, the leftovers are delicious too!

bike 010

Green Bean, Tomato & Feta Pasta

  • 2 Tbsp. olive oil
  • 2 cloves minced garlic
  • salt and pepper to season
  • 1 - 2 Tbsp. balsamic vinegar (I always add around 2 Tbsp.)
  • 3 Tbsp. chopped fresh basil
  • 2 large tomatoes chopped
  • 1 pound penne pasta
  • 1 pound fresh green beans – washed, trimmed, and rinsed
  • 4 ounces of crumbled feta cheese
  1. Combine the first six ingredients in a bowl and let it sit while you get the rest of your ingredients ready.
  2. Cook your pasta until it is al dente.
  3. Steam the green beans until tender – about 5 minutes.
  4. Now it is time to toss!  Add the feta cheese to your tomato mixture and stir until it is combined.  Now toss in the green beans & pasta and stir until coated.
  5. Serve & enjoy! 

Alisa_Signature

Wednesday, May 11, 2011

{{What I Made Wednesday}} #8

It’s Wednesday again….and it’s time for another {{What I Made Wednesday}} Linky Party!  Yeah!  Here are some of the amazingly crafty projects that were linked up last week….you are all SO creative!!!

image

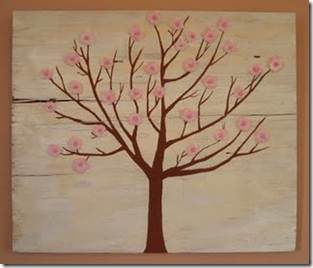
Marvelously Messy made this incredibly cute apple blossom art out of sub flooring!  Hard to believe, right?!?!  I am in awe over this project and can’t wait to make one for myself!

image

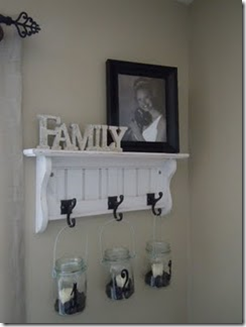
Isn’t this cute?  I absolutely love how Spinning Our Webb’s shelf makeover project turned out!  I would love to replace our current coat hooks with a shelf just like this…love it!

image

The Happy Scraps created this adorable pencil bouquet that any teacher would LOVE to get as a gift.  Or, anyone for that matter! 

image

A Recovering Craft Hoarder came up with this incredibly clever bookmark idea!  I know my kiddos would love making some of these to put in their own books!  How fun!

Now on to the What I Made Wednesday Party…..

{{The Details}}:

  • Must be made by you.
  • Link up to your specific post - not your main blog.          (Please no Etsy shops or giveaways)
  • Please post our button or link back to our blog so more people can join in the fun.
  • Visit some of the other participants and leave them a comment to show your LOVE!
  • We hope you LOVE our blog...if you do, we would LOVE it if you become a follower!

{{What I Made Wednesday}} will be open Wednesday – Friday. Next Wednesday we will feature some of our favorites from this week's party as well as host a new {{What I Made Wednesday}}!


Tuesday, May 10, 2011

Subway Art Flower Pot

F

My inspiration for this project came from all of your amazing subway art projects out there in blog world!  I wanted to add some character to this flower pot and thought subway art was the perfect way to go!  This project was for a Mother’s Day gift but would be perfect for any occasion.  I’m planning on making one for myself in the near future!

IMG_1309

To add a personal touch, I added my children’s handprints to the side of the flower pot using acrylic paint.  {{What Grandma can resist their grandchild’s handprint!?!? =) }}  To make the handprints you’ll need:

  • flower pot
  • acrylic paint
  • some sort of paintbush

IMG_1312IMG_1313

Paint your little one’s hand and quickly and carefully place it where you want on the bottom of the flower pot.  {{My 3 year old was MUCH better at cooperating with this project than my 2 year old…but it all turned out great!}}  Instead of painting both the left and the right hand, I just painted one hand and turned it so that it looked like a right and left hand on the flower pot.

image

IMG_1318

While my handprints were drying, I cut out my vinyl words using my Sure Cuts A Lot 2 program.  It is SO simple to use…love it!  All I did was choose different fonts for the words and lay them out on my mat the way I wanted them. When I was finished, I hit cut and my Cricut did all the work! 

IMG_1319

Once your words are cut, you’ll need to weed out the parts you don’t want…like the middle of the closed letters.  I usually use my fingernails for this part put Cricut makes some great tools to help with the stubborn pieces.

IMG_1321

After weeding, apply transfer tape to the top of the words.  I use the paper tape and love it.  It is easy to work with and you can still see through it.  Rub the transfer tape with quite a bit of pressure so that your words stick to the transfer tape.

IMG_1322

Apply your transfer tape to the upper lip of your flower pot.  Rub the letters firmly and then carefully pull the transfer tape away to reveal your lettering. 

IMG_1325

Now plant your flower and you’re finished!  I had some wonderful helpers to do the planting! =)

IMG_1327-1

I LOVE how it turned out!  Since this project was a Mother’s Day gift, I just wanted to say that I hope you all had an amazing day and got to spend some quality time with your families!

Briana_signature

Related Posts Plugin for WordPress, Blogger...