LinkyParties FeaturedOn AdvertiseOn AboutUs ContactUs
Don't forget to link up to our weekly {{What I Made Wednesday Party}}!

Showing posts with label 2x4. Show all posts

Tuesday, November 8, 2011

Googly Eye EEK Blocks

IMG_2496 
Googly Eye EEK Blocks…
 
Yes, yes, I know Halloween is over!
But, this was a guest post I did recently for Clean & Scentsible and I wanted to make sure it got posted for all of you.  Sorry it’s a little late for this Halloween…although, it’s never too early to start crafting for the next Halloween, right? =)
 
Materials Needed:
  • 2x4 – cut into 6” lengths
  • Gray and white acrylic paint
  • Paintbrush
  • Googly eyes
  • Scrapbook paper cut into the letters EEK
  • Mod Podge
  • Glow-in-the-dark paint
  • Round wooden beads
  • Super glue

How to make your own…

IMG_0752
First you’ll need to get a 2x4.  The biggest reason why I love ALL projects that involve 2x4s is because of the price…if you don’t have a 2x4 lying around your garage they are so inexpensive to buy!  Cut your 2x4 into three 6” pieces.  Then, using an electric sander, sand the edges until they are rounded and smooth. (You could definitely do it by hand if you’re so inclined!)
 
IMG_2472
Paint your blocks.  I used a mixture of medium gray and wicker white. 
 
IMG_2473
I only partially mixed the colors though, because I wanted a streaky look.
 
IMG_2474
While your paint is drying, cut out your EEK letters.  I used the font Times New Roman, which is shocking because I usually despise such a basic font.  Who would have knew it would be perfect for this project! :)
 
IMG_2476
To begin attaching the letters, start by applying a thin layer of Mod Podge to the front surface of each block.  Smooth down your paper letters on top of the Mod Podge and then paint a second coat on top.  Let this dry and rub out any bubbles with your fingers as it dries.  **Don’t stress if there are small bubbles…they seem to flatten out as they dry.**
 
IMG_2482
Now for a fun effect, apply a glow in the dark paint to the surface of your EEK letters.  (I used Go Away because I couldn’t find any glow-in-the dark paint.)  Let it dry completely.  Now, when you turn off the lights, your blocks will glow! :)
 
IMG_2486
Now for the fun part!  Using your googly eyes and a thin coat of Mod Podge, cover the front surface (except for your scrapbook letter) with a variety of eye sizes.
 
IMG_2481
Now to add a little height to your middle E.  I found four round wooden beads and painted them white to match my project. 
IMG_2491
After they had dried, I glued them to the bottom of my E block using super glue.  (This step could definitely be optional if you like they blocks the same height!)
 
IMG_2494
 
I LOVED sharing my EEK blocks with you! 
  Briana_signature_thumb1

Tuesday, September 13, 2011

Halloween & Fall Block Ideas & Guest Posters

If you follow me on Pinterest, you’ll know I’m in LOVE with all of the 2x4 crafts out there.  I’m always amazed with the many possibilities of a 2x4…most involving just paint, vinyl, and some Mod Podge.  How fun and easy to turn scraps of wood into something amazing!

Today I’d like to share with you some of my favorite Halloween and Fall block ideas.  I’m inspired by simply writing this post and hope you are too! :) 

These Halloween blocks from Poppies at Play are amazing!  I LOVE LOVE how they stack on top of each other in such a unique way!  And what makes this tutorial even better is that it comes complete with a printable so we don’t have to search for coordinating Halloween paper.

These blocks from Mommy Misfit turned out adorable and I love the fact that you could leave them out through the entire fall season. 

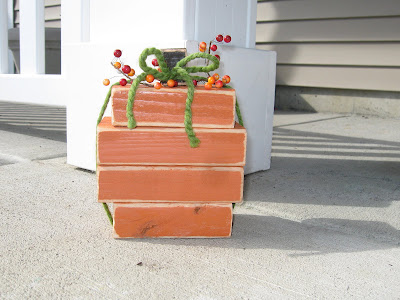
These fall pumpkin blocks from Today’s Fabulous Finds are so fun and would be a perfect addition to any mantle or bookcase!  I LOVE how she sanded the edges down so they’re not perfectly straight. 

I LOVE LOVE these boo blocks from Jamie at The Crafting Chicks.  They are so simple and so cute! 

Under My Umbrella crafted this cute 2x4 pumpkin!  Her tutorial is so easy to follow and looks amazing!

So, which one is your favorite?

And…

We’re looking for guest posters interested in sharing a fall or Halloween craft tutorial on our blog.  Let us know if you’re interested! :)

Briana_signature

Thursday, April 7, 2011

Wood Block Stacker

I recently had the opportunity to guest post over at Night Owl Crafting!!!!  Thanks again Leslie!!  
Just in case you didn’t get the chance to check it out, here is the project I posted.  It is a great addition to the top of my {very} empty bathroom cupboard!
IMG_0964
First you’ll need to get a 2x4.  The biggest reason I love this project is because of the price…if you don’t have a 2x4 lying around your garage they are so inexpensive to buy! 
Cut your blocks into the following lengths:
Soak:  6”
Lather:  8”
Enjoy:  6”
IMG_0752
Then, using an electric sander, sand the edges until they are rounded and smoothed.  {You could definitely do it by hand if you’re so inclined!}
IMG_0795
Now for the paint!  My bathroom is grey so I decided to start by painting my sanded blocks that color, knowing that the majority of the front surface would be covered with scrapbook paper.  {And, I finally found a use for those frequently purchased diaper boxes! =) }
IMG_0918
After the paint has dried completely it’s time for Mod Podge!!  {I heart you Mod Podge!!!} 
IMG_0917
Apply a thin layer of Mod Podge to the front of the block and smooth down your coording paper precut to the dimensions of the front of the block. 
IMG_0919
I don’t wait for the first layer of Mod Podge to dry, I immediately coat the top of the scrapbook paper with another thick layer of Mod Podge.  {Pretty sure I’m not following the Mod Podge directions but it all turns out okay!} 
I like to see the brush strokes, so I add quite a bit!  Using an old credit card, or something similar, smooth out any excess bubbles.  As it is drying, it will seem to bubble slightly.  **Don’t stress…they seem to flatten out as it dries!**
IMG_0921
I like the rustic look, so using sand paper, I roughed up the edges and took some of the paint off of the edges.
Now it’s time for the vinyl!  Using my Sure Cuts A Lot 2 and my favorite font, Larger Mine, I cut out the letters using my Cricut.  {What did I ever do without you Sure Cuts A Lot!?!?!  SO much easier!}  I apologize, but I don’t have any pictures of this step.
IMG_0992
Now stack the blocks and you’re finished!  The top of my bathroom cupboard is looking better already!  Next on my project list…spruce up that old jar!  Love it but it’s not quite right!
Briana_signature
Related Posts Plugin for WordPress, Blogger...